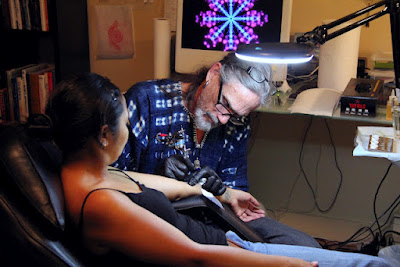
Ellery and Arlyn recently posted the following photos on their own personal blog,
and Ellery gave me the go ahead to repost them here. This is a wonderful
pictorial essay of how their tattoos came to be, from the very first idea,
to the final delicate product, Art in the flesh....
Here is Ellery's explanation of how he and Arlyn ended up
deciding to get matching bee tattoos for their wedding....
"We have this weird thing with bees.
A few years ago I read all these articles about the declining honey
bee population and it freaked me out. On top of everything else,
Einstein was quoted as saying that when the last bee dies,
we have 4 years of life left! (Don't get too freaked out...
this may just be a rumored quote... I checked www.snopes.com)
With yet another thing to keep me awake at 3:00 am,
I decided to do whatever I could to help stop the declining bee populations
- by this I mean turning down plastic bags at Safeway and
making a loud statement to the cashier that I was
"DOING IT FOR THE BEES!"
Somehow this lead to Arlyn and I buying things that had bees on it.
I bought her a bee ring...
bee shirts...
commissioned bee art..."
Bee Jewelry
Bee Art
Bee Artist, Joseph Gilland,
chatting in his beautiful garden, before getting down to business
Some of Joseph's Art, one of his earliest paintings,
displayed on the fireplace in the tattoo studio.
Another of Joseph's paintings, this is an elaborated
version of my 'Buddha Skull' design that I designed for
my chest and ended up doing for my friend Dee, on her calf.
Dee's Buddha Skull Tattoo
This is the design that Ellery and Arlyn finally decided on
I printed out several to have extras just in case.
I cut one bee out and traced it over special stencil paper
designed for applying images on the skin for tattooing.
Applying the stencil.
Arlyn wanted her bee to sit just below the crook of her arm, on a slight angle,
and appear to be headed towards the beautiful lotus tattoo on her wrist...
We made sure Arlyn liked the placement 100%
Tattoo machines at the ready...
And off we go....
I used three different densities of black ink for lining and shading,
diluted with witch hazel for the bee tats.
One 100% black ink,
one 50% ink, 50% water,
and one 10% ink, 90% water.
I started on the front let leg of the bee, then the head, using a fine 3
liner needle and varying the use of pure black and diluted grey inks.
Very detailed, demanding work, I had to ask Arlyn
to hold her breath from time to time.
But for the most part we chatted away and it went
very, very smoothly, taking only about 90 minutes,
start to finish. Arlyn reported that it was almost pain-free,
she didn't suffer needlessly...
And here we have MY first bee tattoo. I'd like to try
doing a wide variety of bugs and critters.
I wanted to be a naturalist artist when I was a young boy,
discovering rare animals and doing perfect drawings of them..
It's different, but this is even cooler...
Ellery's stencil is ready to go.
Ellery's is on his left wrist.
When I did Ellery's bee, I benefited greatly from the
experience of the first bee. I followed the exact same procedure,
starting on the legs first, and working across the bee the same way,
only this one only took 50 minutes start to finish!
When my own wrist was tattooed by Autumn Skye,
it honestly hurt like hell. But Ellery sat quietly smiling
and said it didn't hurt at all. Amazing.
The wrist is nice because it is easier to move around than some parts of the body.
And here's Ellery's finished bee tattoo.
And here they both are together. Total elapsed time under
the tattoo machine, 2 hours and 40 minutes.


